The problem starts when the owners can’t determine whether the Jeep Cherokee’s bad ground symptoms are responsible for all these problems. If you have a Jeep Cherokee, we can realize how difficult it is for you to recognize the exact symptoms.
The proper ground connection between the engine and the metal chassis of the Jeep is essential to ensuring the proper function of the engine. Due to rust or corrosion, the negative terminal of the battery or ground cable goes wrong, leading to several electrical issues in the system.
Luckily, it is pretty easy to figure out. The most apparent problems due to bad ground include a dead battery, low voltage, flickering light, engine starting problems, electrical device malfunctions, etc. Go on reading our comprehensive guide on how to diagnose these issues effectively.
10 Major Jeep Cherokee Bad Ground Symptoms With Easy Fixes

1. Starting Failure
Whenever there is a grounding issue in Jeep Cherokee, it will certainly fail to start. There are several reasons why the Jeep is refusing to start. Mainly, it is related to the battery or other start-up components like the ignition switch, starter, or spark plug. Higher chances are these parts are damaged, dirty, or corroded.
Due to a bad ground connection, the solenoid valve fails. A defective solenoid valve leads to the starter motor won’t work as it fails to suck the necessary power voltage from the battery. That means when you turn the ignition key, the engine won’t start or crank, and you may not hear any clicking sound from the engine.
The loose or corroded wiring connection between the battery and starter or issues with the starting circuit cause the starting issue.
How To Fix
- First, inspect the ground cable and test it electrically. Touch one lead of the multimeter to the metal chassis and attach the other lead to the end of the ground wire. If the result shows negative, it’s a bet that the ground wire is bad and needs replacement.
- Check the battery of the Jeep to see whether it is getting the right voltage.
- Also, test the power going through the starter solenoid. First, test the starting circuits and replace the bad ones.
- Take a digital multi-meter (DMM) and check the internal continuity of the starter solenoid. If it reads out limits (OL), be sure the solenoid is faulty and you need to replace it. You can expect to paybetweent $400 and $500 to replace the bad starter solenoid.
- If needed, check the ignition switch, fuel pump, and spark plug as any of them could be damaged or disconnected.
2. Defective Air Conditioning
The most apparent cause that hinders the normal operation of the air conditioning system on the Jeep is the bad grounding wire. A higher possibility is the ground strap is in bad shape, damaged, or worn out. Due to the defection of the ground wire, there will be a communication error within the system, leading to your air conditioner stopping working.
Though it is one of the major reasons for the malfunction of the air conditions, not the last one. Other major reasons would be clogged cabin air filter, dirty condenser, evaporator, refrigerant leakage, compressor or blower motor failure.
How To Fix
- Check the ground strap and replace frayed or broken wires.
- If the fixing of the ground cable has been ruled out, inspect and clean out the clogged cabin air filter, condenser, and evaporator.
- Check the refrigerant for any leakage and seal it with the right replacement component.
- In most cases, a broken compressor or a bad blower motor is the core reason for the bad AC system. We recommend contacting a professional to detect the actual faulty parts.
3. Low Voltage
- The low voltage of the Jeep is one of the major reasons for bad grounding cable connections. Though there will be a power supply to the component, the voltage power will not be as strong to continue the normal functions. In most cases, the car won’t receive any power from the battery.
- A dead or low battery is another main culprit behind this issue, as it is not charged due to a faulty or loose ground strap.
How To Fix
- Whatever the fact is, you need to test the battery electrically. To do so, take a voltagemetrer and connect the probes toh each terminal of the battery.
- If the reading is not showing around 12.6 volts, be sure it is dead and you need to replace it. Aside from the dead battery, don’t forget to check the ground strap to ensure it’s not damaged.
4. Dimming Or Flickering Lights
- One of the most common symptoms of the bad ground system is dimming and flickering lighting. This happens due to voltage drop from the bad grounding system. There creates high resistance within this Jeep and the headlights start flickering or dimming.
- Whenever you encounter the dim light of the Jeep, it is a clear warning sign, indicating the faulty circuit. In most cases, simply loosened ground is the responsive factor.
How To Fix
Inspect the ground wring circuit and fix up the loosened ones. Check for signs of rust or corrosion on the connection. Clean the contacts using sandpaper. Then do a conductivity test between the battery-negative terminal and the chassis/body of the vehicle. The reading should be very close to zero ohms.
If you find the cable damaged or worn out, you need to replace them. Most of the time, it is related to the weak battery or corrosion in the battery terminal, and due to that it can’t properly power the lights. So it is better to measure the voltage of the battery with a multimeter.
Also, look for loose electrical connections or corrosion on the battery terminals. Clean the terminal. If the cleaning doesn’t work, you need to replace the dead battery.
5. Non-operational Dash Gauge
If the ground connection of your Jeep Cherokee goes bad due to rust or corrosion, you will encounter several types of issues, including dash gauge failure. The digital dash or instrument cluster is a necessary element of the Jeep system that provides important information essential for safe driving.
Anyway, behind a defective dash gauge, the bad grounding is one of the big suspects. But that’s not the last cause to blame. Other major reasons include blown fuses, loose connectors, bad sensors, stripped gearing, overloaded circuits or at times faulty instrument clusters.
How To Fix
- Inspect all the circuits or electrical connections to the grounding system. Fix the loosed one and replace the deteriorated one. If that doesn’t prove well, verify the fuse box, electrical connectors, and the speedometer sensor. Ensure all the components are in good working order.
- Inspect the instrument clusters for any defection. If you are inclined to technical facts, it’s better to contact a professional to do the best task for you.
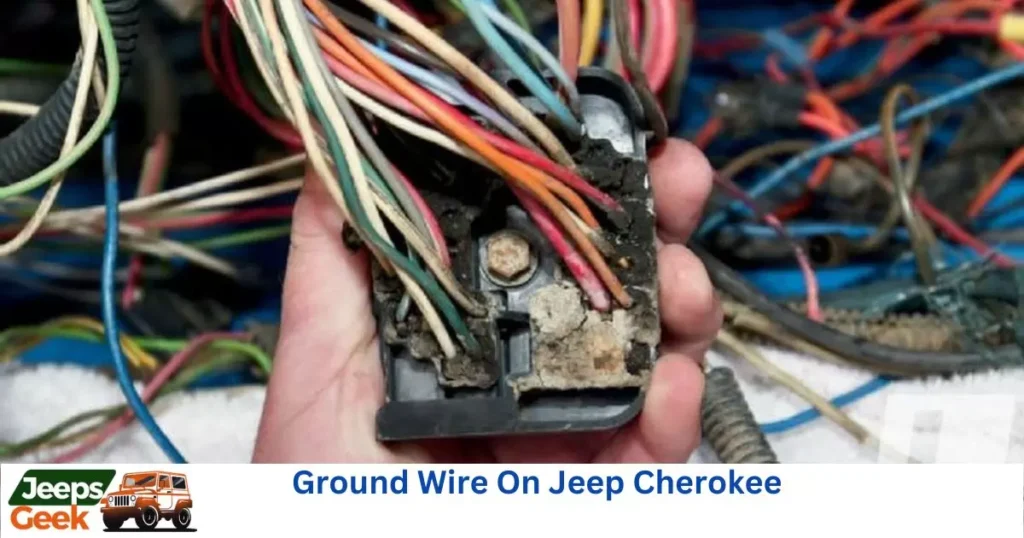
6. Damaged Visible Ground Cable
When dealing with the malfunctioning of the ground system in the Jeep Cherokee, it becomes apparent that the ground strap is in bad shape. This deterioration is easily visualized, serving as a sign that the grounding system is not operating optimally. The best chances are that any of the cables are inspected from any portion or completely damaged.
How To Fix
Inspect each of the circuits and cables connected to the Jeep ground. Look for any signs of physical damage. Replace any damaged cables with new ones.
7. Radio Interference
If faults occur in the ground system of your Jeep Cherokee, you may notice that the stereo becomes noisy after extended driving. Typically, a braided ground strap connects to the radio body from behind. If the antenna cable and the wire harness connected to the ground are damaged, the stereo may either cease to operate or produce unpleasant sounds.
How To Fix
To address stereo issues related to grounding problems, check the stereo cables to ensure proper grounding and functionality. Perform a test using a light across the radio power leads. If you identify power, ensure it is grounded correctly. Additionally, examine the power at the fuse, replacing any blown fuses. If power is present, investigate for signs of bad wiring between the fuse and the radio. Noise from the Jeep’s radio may also result from a faulty amplifier. Replace the problematic radio or defective leads with new ones, ensuring stable contact with the plug.
8.Stalling Engine
A Jeep Cherokee with a bad ground system might experience engine stalling issues. Grounding problems can disrupt the communication between various engine components, causing the engine to stall unexpectedly. This can lead to inconvenient breakdowns and safety concerns.
How To Fix
Conduct a thorough inspection of the ground connections related to the engine components. Check for loose or corroded connections. Clean the contacts and ensure a secure ground for critical engine parts. If the issue persists, consult a professional mechanic to diagnose and fix the stalling problem.
9. Malfunctioning Power Windows
Grounding issues in a Jeep Cherokee can extend to affect power windows. If the grounding system is compromised, the power windows may operate intermittently or fail altogether. This can be frustrating for vehicle occupants, especially during unfavorable weather conditions.
How To Fix
Inspect the grounding connections associated with the power windows. Look for signs of corrosion or damage. Clean the connections and replace any faulty wiring or components. Ensure a solid ground for the power window system to function smoothly.
10. Inoperative Brake Lights
A faulty ground system can impact the proper functioning of brake lights in a Jeep Cherokee. Dim or non-functional brake lights pose a significant safety risk, as they are crucial for indicating braking intentions to other drivers on the road.
How To Fix
Check the ground connections for the brake light circuit. Address any loose or corroded connections by cleaning and securing the contacts. Verify the condition of the wiring and replace damaged components. Properly functioning brake lights are essential for road safety, so prompt repairs are crucial.
Read also: Jeep Wrangler Years To Avoid: 5 Worst Years To Stay Away From|2024
How To Test Ground Wire On Jeep Cherokee?
Before moving to the replacement of the ground wire, it will be worth testing the wire to determine whether it is defective or not. Plus, it will help to determine whether the circuit is open or closed.
The testing procedures of the ground wire are quite straightforward. Let’s walk you through a few phases to test the ground.
Phase #1 – First, take a digital multimeter and set its volts read to ohms.
Phase #2 – Now locate the battery and find the negative cable terminal for testing.
Phase #3 – Attach one probe of the multimeter to the negative (-) terminal of the battery and the other end to the metal part of the Jeep’s chassis.
Phase #4 – A well-working ground cable will give the reading closest to Zero. If you have a reading higher than five, be sure the ground wire is not in well working condition.
Phase #5 – Here you can attach a bonding strap or cable between the panel and accessories where the resistance is highest. Otherwise, you need to replace the broken ground wire with the new one.
How To Replace A Ground Wire (Negative Battery Cable) In Jeep Cherokee?
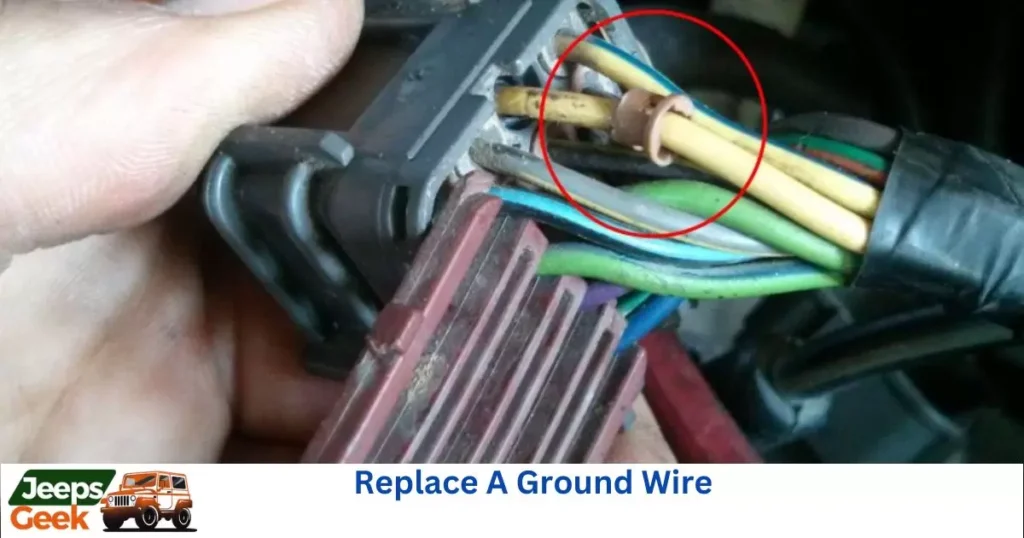
Well! When you are confirmed about the defective ground wire of your Jeep, the only solution is to replace the bad cable with the new one.
Wondering the effective processes? Go through the below step-by-step to make the replacement tasks easier like professionals:
Step 1: Locate The Ground Wire As for the first step, you have to determine the ground wire of your Jeep. It is basically the negative cable of the battery of your vehicle. Find out the battery from the engine compartment. Then remove the cover of the battery to inspect the cables. Now, locate the negative battery terminal having a minus (-) sign next to it while the other one has a plus (+) sign indicating the positive terminal.
Step 2: Unplug The Negative Cable Now it’s time to disconnect the negative wire or ground wire from the connection. To do so, you will need a wrench of about 8mm. Loosen the nuts and bolts that hold the negative cable with the wrench. Once the connection is loosened, simply wiggle the terminal and pull it up to remove the cable from the battery post. If it is stuck in place and being trouble for you to detach, spray the connection with the WD-40 and let it sit for a while.
Step 3: Remove The Positive Cable At this part, you may detach the positive cable because the negative wires can’t be reached unless you remove the complete battery terminal. In that case, disconnecting both cables is quite needed. Go through the above steps.
Step 4: Take The Battery Out Now, unscrew the attached screws that are holding the battery in place. Once done, remove the battery from the engine and set it aside.
Step 5: Disconnect The Bad Strap In this step, locate the bad ground strap of the battery. Take a wrench and loosen the bolt that holds the ground strap in place. Remove the defective strap.
Step 6: Install The New Ground Wire Now take the new wire and assemble it reversing the above steps. After installing, ensure a snug connection of the wires with the terminal.
Expert tips
Here are some expert tips to consider when dealing with a defective ground wire in your Jeep:
- Thorough Inspection:Before proceeding with any replacements, conduct a thorough inspection of the ground wire. Look for signs of wear, corrosion, or damage. This visual inspection can help you identify the extent of the issue.
- Multimeter Testing:Utilize a digital multimeter to test the continuity and resistance of the ground wire. This will provide quantitative data on the wire’s condition. A well-functioning ground cable should show low resistance close to zero ohms.
- Systematic Removal:When removing the ground wire, follow a systematic approach. Start by disconnecting the negative cable from the battery and proceed step by step. Taking pictures or notes during disassembly can assist in the reassembly process.
- Use Proper Tools:Ensure you have the appropriate tools for the job, including the correct wrench size. Using the right tools helps prevent damage to bolts and nuts, making the process smoother.
- WD-40 Application:If the ground wire is stubborn and difficult to detach, applying WD-40 to the connections can help loosen them. Allow some time for the WD-40 to penetrate and make the removal process easier.
- Secure Battery:When removing the battery, make sure it is properly secured. This prevents any accidents or damage during the replacement process. Safety should always be a priority.
- Clean Connections:Before installing the new ground wire, clean the connections thoroughly. Remove any rust or corrosion using sandpaper to ensure a strong and stable connection.
- Proper Assembly:During the installation of the new ground wire, follow the reverse order of the removal steps. Ensure all connections are tight and secure. Proper assembly is crucial for the effective functioning of the ground system.
- Professional Assistance:If you encounter difficulties or lack confidence in handling the replacement, it’s advisable to seek professional assistance. A certified mechanic or technician can ensure the task is performed correctly.
- Regular Maintenance:Implement a routine maintenance schedule for inspecting and cleaning the ground system. This proactive approach can help identify potential issues before they escalate.
Remember, safety is paramount, and if you ever feel uncertain about the replacement process, seeking professional help is a wise decision.
Pro and Cons
| Pros | Cons |
| Comprehensive symptom identification | Limited information on preventive measures |
| Clear explanations of each symptom | Lack of specific timeframe for maintenance |
| Step-by-step guide for diagnosis | Limited emphasis on DIY vs professional help |
| Easy-to-follow solutions for each issue | Incomplete information on testing methods |
| Expert tips for dealing with ground wire | Some information might be overly technical |
| Inclusion of safety precautions | Limited explanation of certain terms |
This table highlights some of the positive aspects and areas that might need improvement in the provided information.
Conclusion
In summary, the article provides a detailed guide on identifying and addressing bad ground symptoms in Jeep Cherokee vehicles. It effectively outlines seven major symptoms, including starting failure, defective air conditioning, low voltage, dimming or flickering lights, non-operational dash gauges, damaged visible ground cables, radio interference, as well as additional issues like a stalling engine, malfunctioning power windows, and inoperative brake lights.
The solutions offered are comprehensive, offering step-by-step instructions, expert tips, and safety precautions. However, there are some limitations, such as the lack of specific preventive measures and a specific timeframe for maintenance.

Meet James Wilson, the driving force behind “Jeeps Geek.” As a dedicated Jeep enthusiast, I’ve navigated the trails, tinkered under the hood, and conquered every off-road challenge. Join me on the Jeeping journey where I share insights, troubleshoot issues, and celebrate the thrill of the open road.